


类似的这位youtuber也有做过测试,我翻译了一下他的视频。
source: https://www.youtube.com/watch?v=Nw2dwPjr_JA
致各位胶片摄影爱好者及专业人士:
本文将探讨一项旨在提升胶片数字化质量的技术方案:结合使用JJC类型的小型翻拍器与外部闪光灯,并利用墙壁作为反射面进行照明。对于已具备基础翻拍设备并期望进一步优化成像质量的用户而言,此方法提供了一种低成本、高效率的途径。
核心摘要: 对于已配备JJC翻拍器(或其他具备透光底座的类似设备)并致力于获取卓越扫描成果的用户,我们推荐采用外部闪光灯结合墙壁反射的照明技术。此方案能够模拟大型柔光设备的照明效果,显著提升数字化图像的均匀性和整体质量。
技术优势分析:闪光灯 + JJC翻拍器 + 墙壁反射方案
- 瞬时曝光,确保图像锐利度: 外部闪光灯提供高强度瞬时光源。配合恰当的快门速度(通常为相机的最高闪光同步速度,如1/160s、1/200s或1/250s),能够有效凝固瞬间,最大限度减少因机身或环境振动导致的图像模糊,从而确保最终成像的锐利度。
- 墙壁作为大面积反射面,提供高度均匀的漫射光: 此方案的关键在于将墙壁(优选白色或浅色哑光平面)作为主要反射体。闪光灯光线经墙壁大面积漫反射后,形成柔和且均匀的照明,通过JJC翻拍器的透光底板照射胶片,有效避免了直射光源可能产生的热点效应和不均匀问题。
- 优化色彩还原与动态范围: 高质量闪光灯通常具有接近日光的色温和较完整的光谱特性。结合均匀的漫反射照明,有助于更准确地还原胶片的原有色彩,尤其是在处理肤色、中性灰阶以及避免暗部色彩偏移方面表现优越。同时,良好的照明条件亦有助于捕捉胶片更宽广的动态范围。
实施方案与关键参数配置:操作流程与注意事项
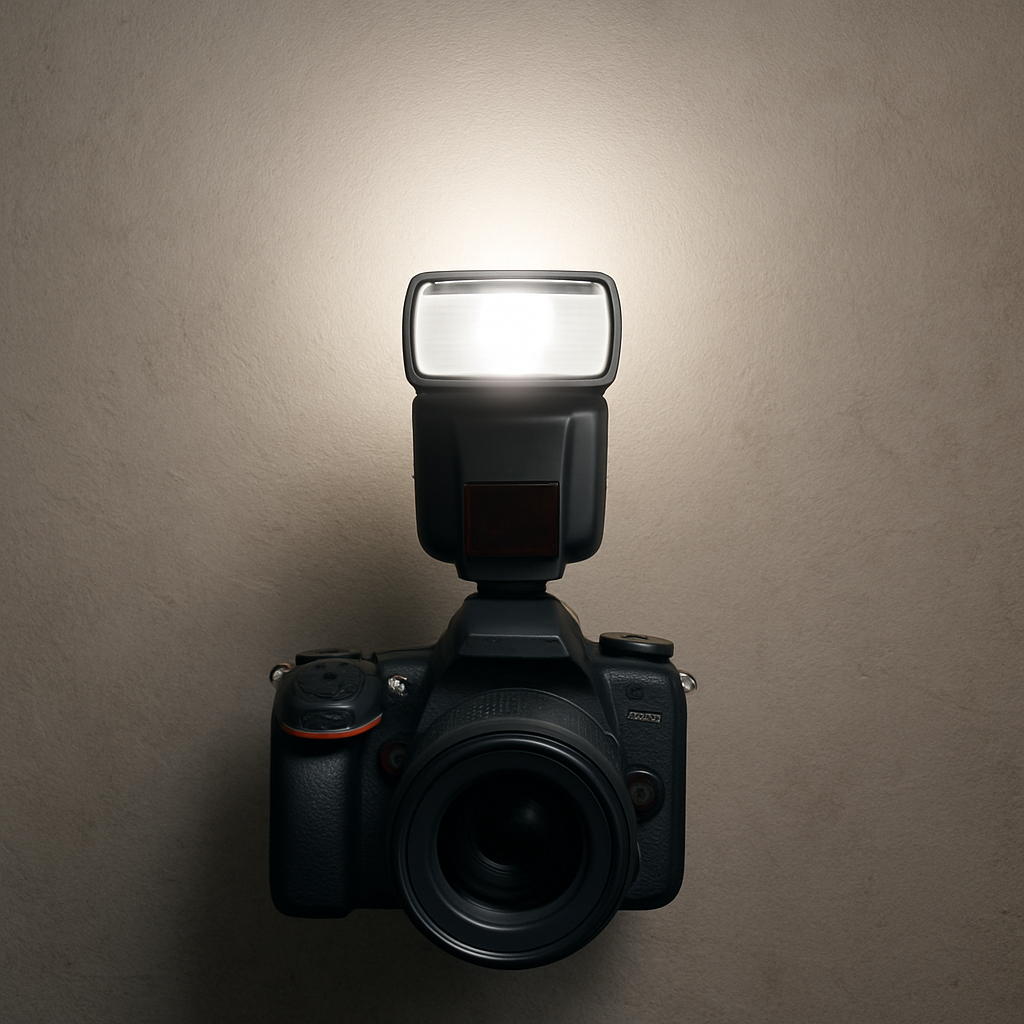
所需设备: 数码相机、微距镜头(或配合近摄皮腔/接圈)、JJC翻拍器、离机闪光灯(配备无线引闪器为佳)、合适的墙壁反射面。
- 步骤一:设备布局与对准——精确的空间关系
- 相机与JJC翻拍器: 将相机安装于三脚架等稳定支撑上,确保镜头通过JJC翻拍器能对胶片进行精确对焦,并维持镜头光轴与胶片平面的严格平行。JJC翻拍器通常有助于固定胶片位置并保持平整。
- 闪光灯与墙壁:
- 将离机闪光灯灯头指向选定的墙壁反射面。可适当调整灯头角度(如轻微上扬),以优化反射效果并避免杂光直接进入镜头。
- 距离控制: 闪光灯与墙壁的距离、JJC翻拍器与墙壁的距离,均对光照强度及均匀性有显著影响。建议进行多次试验以确定最佳布局。通常,增加闪光灯与墙壁的距离可扩大有效光源面积,提升光线柔和度,但会降低光照强度。
- 墙面选择: 理想的反射面为大面积、平整、中性白色或浅灰色哑光墙壁,以避免引入色偏或不必要的镜面反射。
- 步骤二:对焦操作——确保闪光触发前的精确合焦
鉴于闪光灯仅在曝光瞬间点亮,对焦时胶片区域可能光照不足。
- 解决方案: 采用辅助对焦光源。可在对焦阶段使用小型LED灯或台灯从JJC翻拍器侧面或顶部(不遮挡拍摄光路的位置)为胶片提供临时照明,辅助相机自动或手动对焦。完成对焦后,务必移除或关闭辅助光源,再进行闪光拍摄。
- 推荐方法: 利用相机实时取景(Live View)模式,并放大对焦区域,进行精细手动对焦。
- 步骤三:曝光参数设定——快门、光圈、ISO与闪光功率的协同
曝光主要由闪光灯输出功率和相机光圈共同决定,快门速度主要用于实现闪光同步并排除环境光影响。
- 快门速度 (Shutter Speed):
- 基本原则:设定为相机的最高闪光同步速度或略低于该值(例如,相机最高同步速度为1/200秒,则可设定为1/200秒或1/160秒)。
- 原理阐述: 此设置确保在快门帘幕完全开启的瞬间触发闪光,从而完整捕捉闪光脉冲。同时,较高的快门速度有助于抑制或消除环境光的干扰,使成像曝光主要依赖于受控的闪光照明。
- 重要提示: 避免设置超过相机最高闪光同步速度的快门值(除非使用支持高速同步HSS/FP的闪光灯和相机,但这对于静态翻拍通常非必需,且可能影响光质均匀性及输出功率)。
- 光圈 (Aperture):
- 选用镜头的最佳成像光圈,通常介于f/8至f/11之间。此范围可提供理想的图像锐度及足够的景深,确保胶片从中心至边缘均清晰成像。
- ISO:
- 采用相机的原生最低ISO感光度(如ISO 100或ISO 200),以最大程度降低图像噪点,确保画质纯净。
- 闪光灯功率 (Flash Power):
- 此为主要的调整变量。根据实际光路(闪光灯与墙壁距离、墙壁反射率、JJC翻拍器与墙壁距离)及相机光圈、ISO设定,从闪光灯的较低手动输出档位(如1/32 M或1/16 M)开始测试。
- 通过试拍并检视相机直方图,精细调整闪光灯输出功率,直至获得理想曝光。目标是确保胶片最亮区域(对于负片是未曝光的片基部分,对于正片则是高光细节)保留细节且无溢出,同时暗部细节亦得到充分展现。
- 快门速度 (Shutter Speed):
- 步骤四:环境光控制与反射管理
- 解决方案:
- 尽管较高的快门速度有助于排除环境光,但仍建议在光照条件相对较暗的环境中操作,以避免强环境光(如日光直射、室内主照明灯)影响胶片曝光的色彩准确性,或在JJC翻拍器及胶片表面形成不必要的反射。
- 留意JJC翻拍器顶部相机拍摄开口处,防止相机机身、操作者衣物或周围环境物体在胶片上形成反射。
- 解决方案:
方案有效性原理
- 大面积漫反射模拟柔光箱效果: 墙壁作为广阔的反射面,将点状或小面积的闪光灯光源转化为大面积的漫射光源,提供了高度柔和且具有良好包围感的照明。
- 闪光灯的优质光谱特性: 高品质闪光灯通常具备接近标准日光(约5500K-6000K)的色温及相对完整的光谱分布,这对实现准确的色彩还原至关重要。
- 精确的曝光控制与环境光排除: 闪光灯的瞬时高强度输出特性,结合恰当的快门同步速度,能够有效压暗乃至消除环境光的干扰,使成像曝光完全取决于经过优化的闪光照明。
- JJC翻拍器的辅助作用: 该类设备为胶片的平整固定和相机与胶片间特定摄距的维持提供了便利,简化了翻拍系统的搭建。
结论与实践建议
采用JJC翻拍器与墙壁反射闪光技术进行胶片数字化,虽然在初始设置和参数调试阶段需要一定的耐心与实践,但其在提升光照均匀性、色彩准确性和图像锐度方面的潜力显著。对于追求高品质扫描成果的摄影师和爱好者而言,这是一项值得投入和掌握的技术。
欢迎各位分享您在实践过程中的经验、成果以及创新的配置方案,以供同行交流与参考。探讨在使用此方法时遇到的技术难点及相应的解决方案,亦有助于共同提升胶片数字化水平。
感谢阅览。若本文对您的工作有所裨益,或激发了您对高品质胶片数字化的进一步探索,我深感欣慰。
To esteemed film photography enthusiasts and professionals:
This document will explore a technical solution 커피 머신 aimed at enhancing the quality of film digitization: the combined use of a JJC-type small format copier and an external flash, utilizing a wall surface as a reflector for illumination. For users already equipped with basic copying setups and aspiring to further optimize imaging quality, this method offers a cost-effective and efficient pathway.
Core Abstract: For users equipped with a JJC copier (or similar devices with a translucent base) and committed to achieving superior scanning results, we recommend employing external flash illumination मूड combined with a wall-bounce technique. This approach can simulate the lighting effects of large softboxes, significantly improving the uniformity and overall quality of digitized images.
Technical Advantages: Flash + JJC Copier + Wall Bounce Solution
- Instantaneous Exposure, Ensuring Image Sharpness: An external flash provides a high-intensity, instantaneous light source. When paired with an appropriate shutter speed (typically the camera’s maximum flash sync speed, e.g., 1/160s, 1/200s, or 1/250s), it effectively freezes the moment, minimizing image blur caused by camera or environmental vibrations, thus ensuring a tack-sharp final image.
- Wall as a Large Reflective Surface, Providing Highly Uniform Diffuse Light: The crux of this solution lies in using a wall (preferably a white or light-colored matte surface) as the primary reflector. Flashlight, after being diffusely reflected over a large area of the wall, creates soft and uniform illumination that passes through the translucent base of the JJC copier to light the film, effectively avoiding hot spots and unevenness common with direct light sources.
- Optimized Color Rendition and Dynamic Range: High-quality flash units typically possess a color temperature close to daylight and a relatively complete spectral output. Combined with uniform diffuse illumination, this facilitates more accurate color reproduction of the original film, particularly excelling in handling skin tones, neutral grays, and avoiding color casts in shadow areas. Furthermore, good lighting conditions also help in capturing a wider dynamic range from the film.
Implementation and Key Parameter Configuration: Operational Procedures and Considerations
Required Equipment: Digital camera, macro lens (or bellows/extension tubes), JJC copier, off-camera flash (preferably with a wireless trigger), and a suitable wall surface for reflection.
- Step 1: Equipment Layout and Alignment – Precise Spatial Relationship
- Camera and JJC Copier: Mount the camera on a tripod or other stable support, ensuring the lens can achieve sharp focus on the film through the JJC copier and maintain strict parallelism between the lens’s optical axis and the film plane. The JJC copier typically aids in securing the film and keeping it flat.
- Flash and Wall:
- Direct the off-camera flash head towards the chosen wall reflective surface. The flash head can be tilted ઉત્પાદન slightly upwards to optimize reflection and prevent stray light from directly entering the lens.
- Distance Control: The distance between the flash and the wall, and between the JJC copier and the wall, significantly impacts light intensity and uniformity. Multiple tests are recommended to determine the optimal layout. Generally, increasing the flash-to-wall distance expands the effective light source area and improves softness, but reduces light intensity.
- Wall Selection: The ideal reflective surface is a large, flat, neutral white or light gray matte wall to avoid color casts or unwanted specular reflections.
- Step 2: Focusing Operation – Ensuring Precise Focus Lock Before Flash Trigger
As the flash only illuminates at the moment of exposure, the film area may be poorly lit during focusing.
- Solution: Employ an auxiliary focusing light source. During the focusing phase, use a small LED lamp or desk lamp to temporarily illuminate the film from the side or top of the JJC copier (without obstructing the shooting path), assisting the camera’s auto or manual focus. After achieving focus, be sure to remove or turn off the auxiliary light source before taking the flash-lit shot.
- Recommended Method: Utilize the camera’s Live View mode and magnify the focus area for fine manual focusing.
- Step 3: Exposure Parameter Setting – Synergy of Shutter Speed, Aperture, ISO, and Flash Power
Exposure is primarily determined by flash output power and camera aperture, while shutter speed mainly serves for flash synchronization and ambient light exclusion.
- Shutter Speed:
- Basic Principle: Set to your camera’s maximum flash sync speed or slightly below it (e.g., if the camera’s max sync speed is 1/200s, set it to 1/200s or 1/160s).
- Rationale: This setting ensures the flash triggers when the shutter curtains are fully open, completely capturing the flash pulse. Concurrently, a relatively high shutter speed helps to suppress or eliminate ambient light interference, making the image exposure primarily dependent on the controlled flash illumination.
- Important Note: Avoid setting a shutter speed exceeding the camera’s maximum flash sync speed (unless using High-Speed Sync (HSS/FP) capable flash and camera, which is generally unnecessary for static copying and may affect light quality uniformity and output power).
- Aperture:
- Use the lens’s optimal imaging aperture, typically between f/8 and f/11. This range provides ideal image sharpness and sufficient depth of field, ensuring the film is sharp from center to edge.
- ISO:
- Employ the camera’s native lowest ISO sensitivity (e.g., ISO 100 or ISO 200) to minimize image noise and ensure the purest image quality.
- Flash Power:
- This is the primary adjustment variable. Depending on the actual light path (flash-to-wall distance, wall reflectivity, JJC copier-to-wall distance) and camera aperture/ISO settings, start testing from a lower manual output setting on the flash (e.g., 1/32 M or 1/16 M).
- Fine-tune the flash output power by taking test shots and examining the camera’s histogram until the ideal exposure is achieved. The goal is to ensure that the brightest areas of the film (the unexposed base for negatives, highlight details for positives) retain detail without clipping, while shadow details are also adequately represented.
- Shutter Speed:
- Step 4: Ambient Light Control and Reflection Management
- Solution:
- Although a higher shutter speed helps eliminate ambient light, it is still recommended to operate in relatively subdued lighting conditions. This prevents strong ambient light (e.g., direct sunlight, main room lighting) from affecting the color accuracy of the film exposure or creating unwanted reflections on the JJC copier or film surface.
- Pay attention to the camera shooting opening at the top of the JJC copier to prevent reflections of the camera body, operator’s clothing, or surrounding objects from appearing on the film.
- Solution:
Rationale for Effectiveness
- Large-Area Diffuse Reflection Simulating Softbox Effect: The wall, acting as an expansive reflective surface, transforms the point-like or small-area flash source into a large-area diffuse light source, providing very soft illumination with good wrap-around characteristics.
- Superior Spectral Characteristics of the Flash: High-quality flash units typically offer a color temperature close to standard daylight (approx. 5500K-6000K) and a relatively complete spectral distribution, crucial for achieving accurate color rendition.
- Precise Exposure Control and Ambient Light Exclusion: The instantaneous high-intensity output of the flash, combined with appropriate shutter sync speed, effectively suppresses or eliminates ambient light interference, making the imaging exposure solely dependent on the optimized flash illumination.
- Auxiliary Role of the JJC Copier: Such devices facilitate the flat positioning of the film and maintain a specific shooting distance between the camera and film, simplifying the setup of the copying system.
Conclusion and Practical Recommendations
Employing a JJC copier with wall-bounce flash technique for film digitization, while requiring some patience and practice during initial setup and parameter tuning, offers significant potential in enhancing light uniformity, color accuracy, and image sharpness. For photographers and enthusiasts pursuing high-quality scan results, this is a technique worth investing in and mastering.
We welcome you to share your experiences, results, and innovative setup solutions from your practice for peer exchange and reference. Discussing technical challenges encountered and corresponding solutions will also contribute to collectively advancing the standards of film digitization.
Thank you for your perusal. I’m gratified if this article proves beneficial to your work or inspires further exploration into high-quality film digitization.


コメントを残す