


Moltbot とは?
Moltbot(旧名 Clawdbot)は、ローカル環境やVPS上で動作する個人用AIアシスタントです。その中核となる機能は、WebSocket Gatewayアーキテクチャを通じて、ブラウザや複数のメッセージングプラットフォームに接続することです:
- Telegram
- Discord
- Lark/Feishu(向陽先生によるソリューション提供)
- その他…
簡単に言えば、これらすべてのチャットツールで Claude や GPT などのAIモデルを利用できるようにするものです。非常に操作が簡単な Claude Code のようなものですが、機能は Claude Code よりもはるかに強力です。
よく言われる2つの概念、「AIアシスタント」と「デジタル従業員」がありますが、Moltbot を形容するのに非常に適していると感じます。
注意: Moltbot は非常に強力ですが、リリースされたばかりでまだ1ヶ月も経っていないため、多くの問題が存在する可能性があります。
導入オプション:Mac mini vs VPS
Mac mini
Mac mini は価格が高騰しており、現在は約6万円強以上になっています。先週末のライブ配信で宇成さんが Moltbot を紹介していた際、Mac mini を確認しましたが、その時はまだ6万円未満でした。 さらに、キーボード、マウス、モニターなどの周辺機器を揃えると、それなりの出費になります。 適している人: 長期間使用したい人、自宅に固定IPがある人、または外部から自宅の Mac mini に接続するためにイントラネットの透過(トンネリング設定)を行う意欲がある人。そうでないと、外出先から接続できません。
VPS クラウドサーバー
メリット: いつでも開始・停止が可能、常時オンライン、自由に弄り回せる、試行錯誤のコストが低い、いつでも破棄して再構築できる点です(私のサーバーはすでに2回再インストールしました…)。 デメリット: グラフィカルインターフェース(GUI)がなく、一部のデバッグが面倒です。
私は VPS を選択しました。
ステップ1:VPS の購入
ここでは素早く始めるために VPS を選択しました。 Moltbot 公式の推奨スペックは以下の通りです:
- CPU: 2 vCPU
- メモリ: 2 GB
- ストレージ: 20 GB SSD(これで十分)
- OS: Ubuntu 22.04 LTS / Debian 12
私はさらにタスク実行用の Skills を入れたり、将来的に代理サーバー(プロキシ)を立てて遊んだりしたかったので、4C4G(4コア4GB)、OSは Ubuntu 24 を購入しました。価格は3800円でした。
購入後にやること
- サーバーの IP を記録する。
- SSH で接続する:
ssh root@あなたのIP - システムを更新する:
apt update && apt upgrade -y
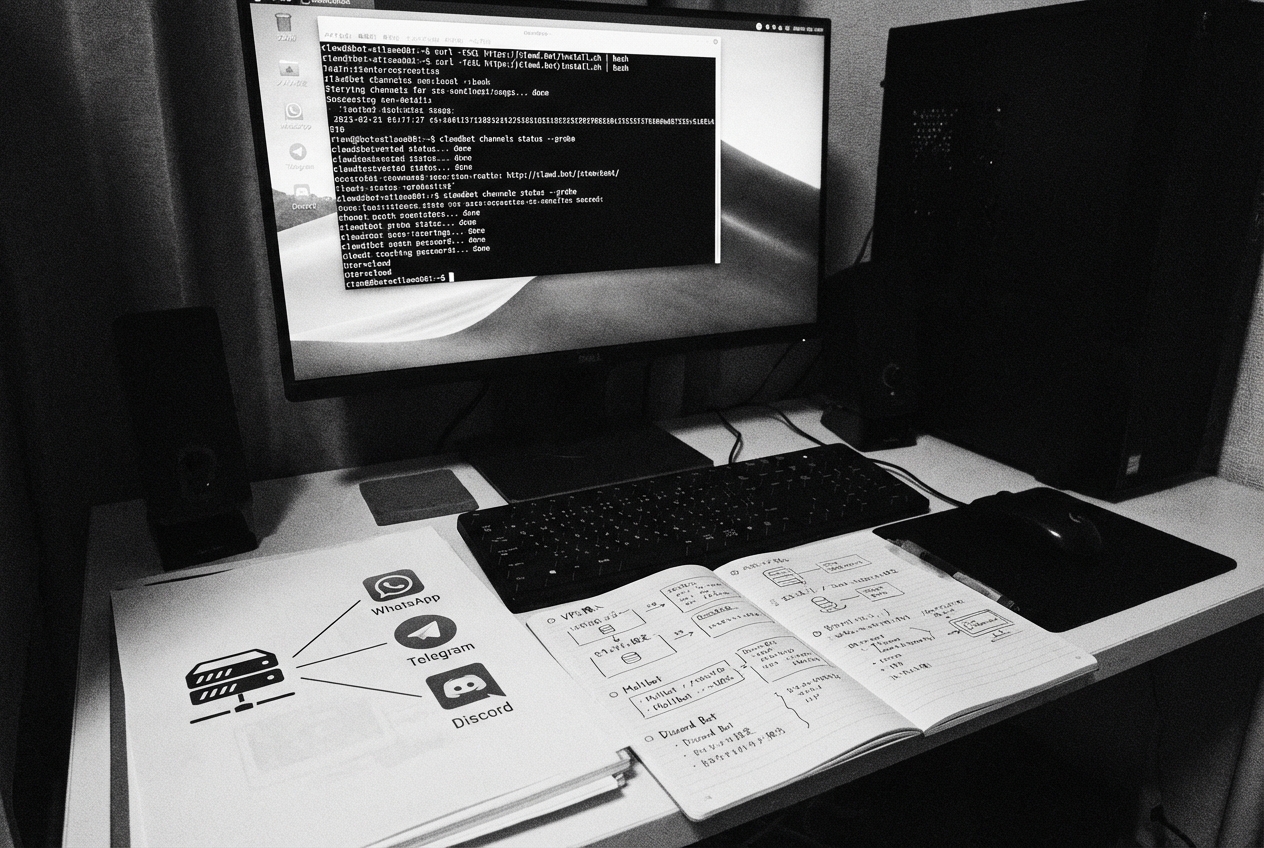
ステップ2:Moltbot のインストール
強くお勧めしますが、全文、少なくとも「セキュリティ設定」の章を読んでからインストールしてください。 セキュリティポリシーによってインストール方法が変わるためです。
一括インストール(推奨、macOS および Linux 対応)
curl -fsSL https://clawd.bot/install.sh | bash
このスクリプトは以下を自動的に実行します:
- システム環境のチェック
- 必要な依存関係のインストール
- Moltbot のダウンロード
- オンボーディング(初期設定)プロセスの起動
インストール中の重要な設定
オンボーディングプロセスでいくつか質問されます:
- Gateway Port: デフォルトは
18789、通常は変更不要。 - Model/Auth Provider: AIプロバイダーを選択
- Anthropic – Claude API を直接使用
- OpenAI – GPT シリーズを使用
- Google – Gemini を使用
- … 基本的に国内外の主要なものはサポートされています。私は Google Antigravity を使用しました。
Google Antigravity OAuth 認証
Google をプロバイダーとして選択した場合、OAuth プロセスに入ります:
- 提示された URL をブラウザで開きます。Mac mini なら直接開けますが、Linux(VPS)の場合は GUI がないため、リンクをコピーして自分の PC の Chrome で開く必要があります。
- 注意:余分な文字が含まれてコピーされる場合があるので、手動で修正してください。
- Google ログイン認証を完了します。
- Chrome のアドレスバーからリダイレクト先の URL(
http://localhostで始まるアドレス)をコピーし、ターミナルに貼り付けます。
その他の設定プロセスもほぼ同様です。
ステップ3:メッセージプラットフォームの設定
インストール完了後、接続したいチャットプラットフォームを設定します。自分が使い慣れているものや導入したいものを選んでください。
ここでは私が深く愛用している Discord を例に説明します。
Discord 設定(詳細版)
Discord の設定は少し複雑で、Discord Developer Portal で Bot を作成し、権限を有効にする必要があります。
1. Discord Bot の作成
- Discord Developer Portal を開く。
- New Application をクリック → 名前を入力 → Create。
- 左側メニューの Bot → Add Bot → Yes, do it! をクリック。
- Reset Token をクリックして Bot Token をコピーします(一度しか表示されないので保存してください)。
2. 必要な Intents を有効化(重要!)
Bot → Privileged Gateway Intents の下で以下を有効にします:
- ✅ Message Content Intent — 必須。これをオンにしないと Bot はメッセージの内容を読み取れません。
- ✅ Server Members Intent — 推奨。ユーザー名検索やホワイトリストのマッチングに使用します。
- ⚠️ Message Content Intent をオンにしないと、Bot は接続に成功してもメッセージに一切反応しません。これは初心者が最も陥りやすい罠です。
3. 招待リンクの生成
左メニュー OAuth2 → URL Generator:
- Scopes にチェック:
- ✅
bot - ✅
applications.commands(スラッシュコマンド対応)
- ✅
- Bot Permissions にチェック(最小権限の原則):
- ✅ View Channels
- ✅ Send Messages
- ✅ Read Message History
- ✅ Embed Links
- ✅ Attach Files
- ✅ Add Reactions
- その他、状況に応じて。
- Administrator(管理者)にはチェックしないでください。Bot を完全に信頼できる場合を除きます。
- 生成された URL をコピーし、ブラウザで開く → インストールしたいサーバーを選択 → Authorize。
4. Moltbot の設定
ターミナルで設定ウィザードを実行します:
clawdbot channels add discord
# ここでコピーした Bot Token を貼り付け
5. ペアリングして使用(DMモード)
DMモードではデフォルトでペアリング認証が必要です:
- Discord で Bot に DM(ダイレクトメッセージ)を送り、適当なメッセージを送信します。
- Bot がペアリングコード(例:
JN4MSY23、1時間有効)を返信します。 - サーバー(VPS)上で承認します:
clawdbot pairing approve discord <ペアリングコード> Approved discord sender <user-id>と表示されればペアリング成功です。
セキュリティの観点から: DMモードの設定は推奨しません。他人がどのようにサーバーにリクエストを送ってくるかが見えないため、セキュリティリスクが存在します。
6. サーバーチャンネルの設定
サーバー内のチャンネルで Bot を使用したい場合は、追加の設定が必要です。
IDの取得(先に開発者モードをオンにする):
- Discord 設定 → 詳細設定 → 開発者モード をオン。
- サーバー名を右クリック → Copy Server ID。
- チャンネルを右クリック → Copy Channel ID。
設定例(特定チャンネルのみ許可、@メンションが必要):
discord: {
      enabled: true,
      guilds: {
        "あなたのサーバーID": {
          requireMention: true,  // @bot とメンションした場合のみ返信
          channels: {
            "チャンネルIDまたは名前": { allow: true }
          }
        }
      }
    }
Bot に自動返信させる(@不要):
discord: {
      guilds: {
        "あなたのサーバーID": {
          requireMention: false,
          channels: {
            help: { allow: true, requireMention: false }
          }
        }
      }
    }
requireMention は true に設定することを推奨します。そうすれば Moltbot にメンションした時だけ反応してくれます。
ステップ4:セキュリティ設定(重要!)
これは昨晩のライブ配信で最も時間を割いた部分です。Moltbot は強力な能力を持っているため、セキュリティ設定は非常に重要です。
デフォルトでは、Moltbot はホストマシン上で直接実行され、システムファイルを変更可能です。この状態では基本的に、IM(チャットツール)、コマンドライン、ブラウザであなたができることは、Moltbot も実行可能です(パスワードや認証コードの入力については確認が必要ですが)。
診断コマンドを実行:
clawdbot channels status --probe
インストール後、Discord に接続してコミュニティで使用させたところ、一部のメンバーがいきなり rm -rf などの危険な操作を試みてきて、私は震え上がりました。
このままではいつかサーバーを壊されてしまうと思い、急いでサンドボックスへ移行することを考えました。
サンドボックスモード(機能制限あり)
簡単です。以下のコマンドで自動アップグレード、自動インストール、自動再起動が行われます。
# コマンドラインでサンドボックスモードを有効化
clawdbot config set agents.defaults.sandbox true

# サービスの再起動
systemctl start clawdbot
有効化すると、Agent のすべての操作は Docker コンテナ内で実行され、ホストシステムに影響を与えられなくなります。 しかし、サンドボックス内では機能が大幅に制限されます。 Shell は実行できず、ネット接続機能も今のところ解決できておらず、Skills も実行できません…。 基本的には使い物になりません。
推奨:専用ユーザーと権限制限による再構築
そこで、別途 clawd ユーザーを作成し、そのユーザーで再インストールする方法をとりました。
その前に、ホスト上の clawdbot をすべてアンインストールしてください(ChatGPT に手順を聞くと丁寧に教えてくれます!)。
sudo adduser clawd
# パスワードを設定し、Enter で進む

# clawd ユーザーに切り替え
su - clawd

# clawdbot を再インストール
curl -fsSL https://clawd.bot/install.sh | bash
その後、root 権限で clawd ユーザーが持つ権限や実行できることを厳格に制限します。
具体的な設定ファイルは以下の通りです:
# sudo vi /etc/systemd/system/clawdbot.service

[Unit]
Description=Clawdbot Gateway Service
After=network.target
Wants=network.target

[Service]
Type=simple

# ========= 実行ID(根本的なセキュリティ境界) =========
User=clawd
Group=clawd

# ========= 作業ディレクトリ =========
WorkingDirectory=/var/lib/clawdbot/workspace

# ========= 起動コマンド(絶対パス、PATH注入回避) =========
ExecStart=/home/clawd/.npm-global/bin/clawdbot gateway

# ========= ライフサイクル =========
Restart=always
RestartSec=3
TimeoutStopSec=30

# ========= ユーザー環境の明確化 =========
Environment=HOME=/home/clawd
Environment=USER=clawd
Environment=XDG_CONFIG_HOME=/home/clawd/.config
Environment=XDG_DATA_HOME=/home/clawd/.local/share
Environment=XDG_CACHE_HOME=/home/clawd/.cache

# ========= リソース制限(4C4G VPS、対外的に安定させる) =========
CPUQuota=200%
MemoryMax=2G
MemorySwapMax=256M
TasksMax=128
LimitNOFILE=8192

# ========= 一切の権限昇格を禁止 =========
NoNewPrivileges=true
CapabilityBoundingSet=
RestrictSUIDSGID=true
LockPersonality=true

# ========= ファイルシステム隔離(核心) =========
# システムディレクトリは読み取り専用
ProtectSystem=strict

# home はデフォルトで読み取り専用
ProtectHome=read-only

ReadOnlyPaths=/home/clawd/workspace

# 書き込みを許可するディレクトリ(最小書き込み権限)
ReadWritePaths=/home/clawd/workspace /home/clawd/.clawdbot /tmp

# プライベート /tmp、横方向への漏洩防止
PrivateTmp=true

# ========= カーネル / プロセス隔離 =========
ProtectKernelTunables=true
ProtectKernelModules=true
ProtectControlGroups=true
ProtectProc=invisible

# ========= ネットワーク(プロトコル族のみ制限、外部ネットは封鎖しない) =========
RestrictAddressFamilies=AF_INET AF_INET6 AF_NETLINK AF_PACKET

# ========= ログ =========
StandardOutput=journal
StandardError=journal

[Install]
WantedBy=multi-user.target
その他にも細かい権限設定があります。ChatGPT に「ホストの root セキュリティをどのように保護するか」を質問すると、多くの有益なアドバイスが得られます。
ステップ5:実戦体験
人格の設定
多くのファイルがあり、各側面の人格を設定できます:
AGENTS.md, BOOTSTRAP.md, HEARTBEAT.md, IDENTITY.md, SOUL.md, TOOLS.md, USER.md
Telegram/Discord での対話
設定完了後、チャットソフトで Bot と直接会話するだけです。Bot は以下を行います:
- あなたの要求を理解する
- ツールを呼び出してタスクを実行する
- 結果を返す
まとめ
全体の流れ:
- VPS または Mac mini を購入
- 一括インストール →
curl -fsSL https://clawd.bot/install.sh | bash - プラットフォーム設定 → Telegram/Discord/WhatsApp
- セキュリティポリシー → 自分の使用シナリオに応じて適切なセキュリティ設定を選択
- 使用開始 → チャットソフトで直接対話
What is Moltbot?
Moltbot (formerly known as Clawdbot) is a personal AI assistant that can run locally or on a VPS. Its core capability utilizes a WebSocket Gateway architecture to connect to browsers and multiple messaging platforms:
- Telegram
- Discord
- Lark/Feishu (Solution provided by Teacher Xiangyang)
- And more…
Simply put, it allows you to use AI models like Claude and GPT within any of the chat apps mentioned above. It’s essentially a very simple-to-operate Claude Code, but with capabilities far exceeding standard Claude Code.
There are two common concepts: “AI Assistant” and “Digital Employee.” I feel both are very apt descriptions for Moltbot.
Note: While Moltbot is powerful, it has just launched and is not yet a month old, so expect to encounter quite a few issues.
Deployment Options: Mac mini vs. VPS
Mac mini
The price of the Mac mini has been hyped up and has now risen to over 60,000YEN. When Yucheng shared Moltbot during the livestream last weekend, I specifically checked, and it was still under 60,000 YEN. Additionally, configuring a keyboard, mouse, and monitor requires extra spending. Suitable for: Users who want to use it long-term, have a static IP at home, or are willing to set up intranet penetration (tunneling). Otherwise, you won’t be able to connect to your Mac mini when you are away.
VPS Cloud Server
Advantages: Start and stop anytime, always online, free to tinker with, low cost of trial and error, and can be destroyed and rebuilt at any time (I have already reinstalled my machine twice…). Disadvantages: No Graphical User Interface (GUI), making some debugging troublesome.
I chose a VPS.
Step 1: Purchasing a VPS
To get started quickly, I chose a VPS. According to Moltbot’s official recommendations:
- CPU: 2 vCPU
- RAM: 2 GB
- Storage: 20 GB SSD (Sufficient)
- OS: Ubuntu 22.04 LTS / Debian 12
Since I wanted to install some extra Skills for task execution and perhaps set up a proxy later, I bought a 4C4G (4 Core, 4GB RAM) setup running Ubuntu 24 for 3800 YEN.
What to do after purchase
- Note down the server IP.
- Connect via SSH:
ssh root@your_ip - Update the system:
apt update && apt upgrade -y
Step 2: Installing Moltbot
I strongly recommend reading the full text, or at least the “Security Configuration” section, before installing. Your security policy will dictate your installation method.
One-Click Installation (Recommended, supports macOS and Linux)
curl -fsSL https://clawd.bot/install.sh | bash
This script automatically completes the following:
- Checks system environment
- Installs necessary dependencies
- Downloads Moltbot
- Starts the onboarding process
Key Configuration during Installation
The onboarding process will ask you a few questions:
- Gateway Port: Default is
18789. Usually, you don’t need to change this. - Model/Auth Provider: Choose your AI provider.
- Anthropic – Use Claude API directly
- OpenAI – Use GPT series
- Google – Use Gemini
- … Basically, all major domestic and international providers are supported. I used Google Antigravity.
Google Antigravity OAuth Authentication
If you choose Google as your provider, you will enter the OAuth process:
- Open the provided URL in your browser. If you are on a Mac mini, you can open it directly. If you are on Linux (VPS) without a GUI, you need to copy the link and open it in Chrome on your local computer.
- Note: Be careful when copying, as extra characters might be included. You may need to manually clean up the URL.
- Complete the Google Login authorization.
- Copy the redirect URL from the Chrome address bar (it starts with
http://localhost) and paste it back into the terminal.
Other configuration processes are roughly the same.
Step 3: Configuring Messaging Platforms
After installation, configure the chat platform you want to connect to. Choose one you are familiar with or want to use.
Here, I will use Discord as an example, as I use it heavily.
Discord Configuration (Detailed Version)
Discord configuration is slightly complex; you need to create a Bot in the Discord Developer Portal and enable permissions.
1. Create a Discord Bot
- Open the Discord Developer Portal.
- Click New Application → Enter a name → Create.
- Click Bot in the left menu → Add Bot → Yes, do it!.
- Click Reset Token and copy the Bot Token (It only shows once, so save it).
2. Enable Necessary Intents (Important!)
Under Bot → Privileged Gateway Intents, enable:
- ✅ Message Content Intent — Must enable, otherwise the bot cannot read message content.
- ✅ Server Members Intent — Recommended for username lookups and whitelist matching.
- ⚠️ If Message Content Intent is not enabled, the bot will connect successfully but will not respond to any messages. This is the most common pitfall for beginners.
3. Generate Invite Link
Go to OAuth2 → URL Generator:
- Scopes check:
- ✅
bot - ✅
applications.commands(Supports slash commands)
- ✅
- Bot Permissions check (Principle of Least Privilege):
- ✅ View Channels
- ✅ Send Messages
- ✅ Read Message History
- ✅ Embed Links
- ✅ Attach Files
- ✅ Add Reactions
- Others based on your needs.
- Do not check Administrator unless you fully trust this bot.
- Copy the generated URL, open it in a browser → Select the server to install to → Authorize.
4. Configure Moltbot
Run the configuration wizard in your terminal:
clawdbot channels add discord
# Paste your Bot Token here
5. Pairing (DM Mode)
DM mode requires pairing verification by default:
- DM the bot in Discord with any message.
- The bot will reply with a pairing code (e.g.,
JN4MSY23, valid for 1 hour). - Approve it on the server:
clawdbot pairing approve discord <pairing_code> - When you see
Approved discord sender <user-id>, pairing is successful.
Security Note: From a security perspective, I recommend not configuring DM mode. You cannot see how others might request your server, creating a security risk.
6. Server Channel Configuration
If you want to use the bot in server channels, extra configuration is needed.
Get IDs (Enable Developer Mode first):
- Discord Settings → Advanced → Enable Developer Mode.
- Right-click Server Name → Copy Server ID.
- Right-click Channel → Copy Channel ID.
Configuration Example (Allow specific channels only, require @mention):
discord: {
      enabled: true,
      guilds: {
        "YOUR_SERVER_ID": {
          requireMention: true,  // Replies only when @bot is mentioned
          channels: {
            "CHANNEL_ID_OR_NAME": { allow: true }
          }
        }
      }
    }
Let the bot reply automatically (No @ needed):
discord: {
      guilds: {
        "YOUR_SERVER_ID": {
          requireMention: false,
          channels: {
            help: { allow: true, requireMention: false }
          }
        }
      }
    }
I suggest setting requireMention to true, so Moltbot only responds when you tag it.
Step 4: Security Configuration (Crucial!)
This was the most discussed part of the livestream. Moltbot has strong capabilities, which means security configuration is vital.
By default, Moltbot runs directly on the host machine and can modify system files. Essentially, whatever you can do in an IM app, command line, or browser, Moltbot can also do (I still need to verify password and captcha inputs).
Run the diagnostic command:
clawdbot channels status --probe
After I installed it and connected it to Discord for my community, some members immediately tried reckless operations like rm -rf, which scared the hell out of me.
These people would eventually brick the machine, so I thought I better move it into a sandbox immediately.
Sandbox Mode (Limited Functionality)
It’s simple. The following commands handle auto-upgrade, auto-installation, and auto-restart.
# Enable sandbox mode via CLI
clawdbot config set agents.defaults.sandbox true

# Restart service
systemctl start clawdbot
Once enabled, all Agent operations run inside a Docker container and cannot affect the host system. However, it is basically crippled inside the sandbox. The shell cannot be executed, networking functions are still broken after much tinkering, and Skills cannot be executed… It’s essentially useless.
Recommended: Re-install with a Dedicated User
Later, I created a separate clawd user and used it to reinstall.
Before doing this, uninstall the clawdbot on the host completely (you can chat with ChatGPT for step-by-step guidance on how to clean it up!).
sudo adduser clawd
# Set password, press Enter through the details

# Switch to clawd user
su - clawd

# Reinstall clawdbot
curl -fsSL https://clawd.bot/install.sh | bash
Then, as root, restrict what permissions the clawd user has and what it can do.
The specific configuration is as follows:
# sudo vi /etc/systemd/system/clawdbot.service

[Unit]
Description=Clawdbot Gateway Service
After=network.target
Wants=network.target

[Service]
Type=simple

# ========= Run Identity (Fundamental Security Boundary) =========
User=clawd
Group=clawd

# ========= Working Directory =========
WorkingDirectory=/var/lib/clawdbot/workspace

# ========= Start Command (Absolute path to avoid PATH injection) =========
ExecStart=/home/clawd/.npm-global/bin/clawdbot gateway

# ========= Lifecycle =========
Restart=always
RestartSec=3
TimeoutStopSec=30

# ========= Explicit User Environment =========
Environment=HOME=/home/clawd
Environment=USER=clawd
Environment=XDG_CONFIG_HOME=/home/clawd/.config
Environment=XDG_DATA_HOME=/home/clawd/.local/share
Environment=XDG_CACHE_HOME=/home/clawd/.cache

# ========= Resource Limits (Stable for 4C4G VPS) =========
CPUQuota=200%
MemoryMax=2G
MemorySwapMax=256M
TasksMax=128
LimitNOFILE=8192

# ========= Forbid All Privilege Escalation =========
NoNewPrivileges=true
CapabilityBoundingSet=
RestrictSUIDSGID=true
LockPersonality=true

# ========= File System Isolation (Core) =========
# System directories read-only
ProtectSystem=strict

# Home read-only by default
ProtectHome=read-only

ReadOnlyPaths=/home/clawd/workspace

# Directories allowed to write (Minimal write permissions)
ReadWritePaths=/home/clawd/workspace /home/clawd/.clawdbot /tmp

# Private /tmp, prevents lateral leakage
PrivateTmp=true

# ========= Kernel / Process Isolation =========
ProtectKernelTunables=true
ProtectKernelModules=true
ProtectControlGroups=true
ProtectProc=invisible

# ========= Network (Restrict protocol families only, allow internet) =========
RestrictAddressFamilies=AF_INET AF_INET6 AF_NETLINK AF_PACKET

# ========= Logging =========
StandardOutput=journal
StandardError=journal

[Install]
WantedBy=multi-user.target
There are many other bits and pieces regarding permissions. You can ask ChatGPT “How to protect host root security,” and it will give you many suggestions.
Step 5: Hands-on Experience
Setting Personas
There are many files where you can configure specific aspects of the persona:
AGENTS.md, BOOTSTRAP.md, HEARTBEAT.md, IDENTITY.md, SOUL.md, TOOLS.md, USER.md
Chatting in Telegram/Discord
Once configured, just talk to the bot directly in your chat software. It will:
- Understand your requirements.
- Call tools to execute tasks.
- Return the results.
Summary
The entire flow:
- Buy VPS or Mac mini.
- One-click Install →
curl -fsSL https://clawd.bot/install.sh | bash - Configure Platform → Telegram/Discord/WhatsApp.
- Security Policy → Choose different security strategies based on your usage scenario.
- Start using → Chat directly within your messaging app.
コメントを残す